![]()
THE OWNER CALLED US IN A DESPERATE STATE

The brick veneer on one side of his 1910 two-story house had pulled completely away from the main structure. Over the years, the waterproofing paper had disintegrated, allowing water to seep behind the bricks and rust away the anchoring system that held them to the wall. The bricks needed to be removed and refastened. Doing so was an extremely sensitive undertaking because the 100 year old clinker bricks were irreplaceable. They were made by inserting salt into a kiln while the bricks were fired, and, although imitations are available, authentic ones are nearly impossible to find. So we had to figure out a way to rebuild the wall using the same bricks- and fast! This project was made all the more difficult by the fact that, due to their nonuniformity, many of the bricks had to be replaced in their original locations.
REMOVING THE BRICKS, ONE BY ONE
We began the project by quickly designing and building a bracing structure to stabilize the wall while we removed the bricks (see right). We then numbered the bricks, took pictures of them in their original locations, and removed them one by one. Because we couldn’t risk breaking them, we did not utilize the standard process of dropping them down a chute to the ground; instead, we constructed special boxes, carefully filled them with the bricks, and used a grad-all machine to bring them down. Once on the ground, we removed the bricks so they could be cleaned, making sure to replace them back in the boxes in the same order (see below).

-
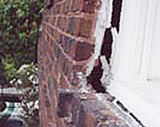
- The bricks were in danger of falling
-
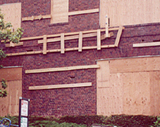
- A bracing structure had to be built
-
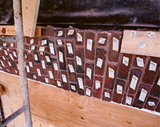
- The bricks were numbered before removing
-
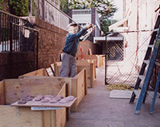
- Boxes were carefully filled with the bricks
-
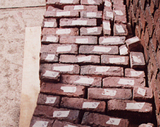
- The bricks were prepared for cleaning